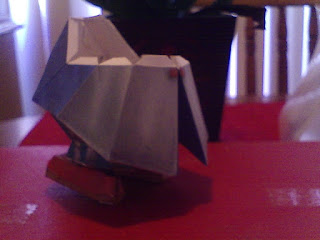
I'm back in black and at it again, Working on my Papercraft before goin to band practice! I've got a pic update of my progress on the Vivi model I've been working on and a few tips that I've thought of as i've been working today. First, Vivi update:
Got the bottom of the jacket, lemme tell you that took a bit of patience!
Then another piece just above that, this model has tons of pieces!
Okay, I'm still working on it currently (like right now I'm blogging this while waiting for glue to dry!) but I noticed some things that I can share with you all.
TIP TIME!
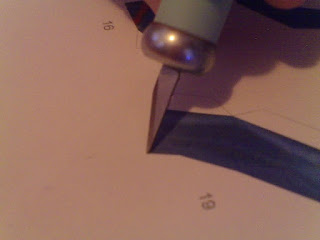
1: Cut carefully!! Now this may be a no-duh tip, but you'll be surprised how little it takes to screw something up. Here's my example:
Now that's frustrating! As you can see, there are no other white lines on the bottom half of the model, just that one spot. That came from being distracted and angling my blade the wrong way. When you cut a piece, you should angle your blade slightly away from the piece.
 |
| This is the angle you want to cut at, tilting the blade AWAY from the piece. |
This way the blade is cutting in and UNDER the piece, so if you do screw up by a micromillimeter it wont be bad because you wont be exposing the white paper under the ink of the piece. You can cut straight down also, but I find that its easier to stay exactly along the edge of the piece if you cut at an angle. For your reference, and cause I took the pics:
 | |
| Straight |
 |
| Wrong! This is how I screwed up the piece in the top pic. |
It will just make your models cleaner and save you from disappointment overall.
Tip 2: Glue an anchor, then wait!
Most models go in sections, some of them large, some insanely small and delicate, either way, the best way to keep control of the model and get everything aligned is to glue an anchor and wait.
Start with the center or one edge of the piece, glue it, let it dry, and then you will have a much easier time gluing the subsequent tabs on that piece. It's a pain in the butt to wrestle an entire piece trying to glue multiple tabs. It exercises your patience, but trust me, its the best way to go.
Tip 3: Reinforce!!
Paper, even cardstock, isn't the sturdiest medium to work with, and it can fall apart. To make your models last, you should reinforce the weakest points, obviously the points where its glued together. Whenever your done gluing a piece in its entirety, simply take your toothpick and glue and put a layer on the INSIDE of the model, coating the joints and effectively reinforcing your model. Depending on what stock your using you'll use more or less glue to reinforce. On regular A4 use very little, on cardstock you can be a bit more generous without compromising the paper.
Tip 4: Relax!!
I know how stupid that sounds, but just take it from me, you wanna have fun and be relaxed for this, just like any other hobby. If you're the type that likes to focus and zone out to relax, go ahead and hit it stressed. If you're anything like me, you wanna be relaxed enough to focus and zone out before you hit it. Personally I stick some blues (Son House and Johnny Winter FTW!) on Pandora radio, brew a pot of coffee, clear the kitchen table and go into my own little world.
Thanks again for reading and I hope you get some use out of these tips. As always remember to check paperkraft.net for more awesome models (seriously, those guys have the best stuff) and pretty please leave me some comments :D
Thanks again for reading and I hope you get some use out of these tips. As always remember to check paperkraft.net for more awesome models (seriously, those guys have the best stuff) and pretty please leave me some comments :D


No comments:
Post a Comment
Tell me what you think about what I think!